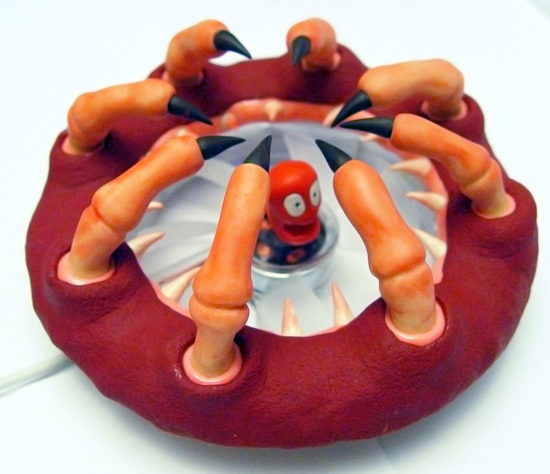
Editor’s note: if somebody missed all the action, let us remind you that there was a mini modding contest hosted by Modding.ru from November 26 to December 5, 2010. This time fan grills were chosen as the theme of the contest, so participants were required to make an original and stylish fan grill. Despite the large number of participants and competition from many decent projects, the contest was won by Gluk a.k.a. Dorosh with his coolest project Alien grill. After the contest was over, he decided to write the worklog of this contest winning project, which you can read below.
I finally found some time to finish the grill and write the worklog of its creation. I must say that the worklog turned out not too detailed, mostly since the camera isn’t really the best thing to grab with your hands after you worked with polymer clay. Nevertheless, I will try my best to mention all the key stages of the process. So, here we go.
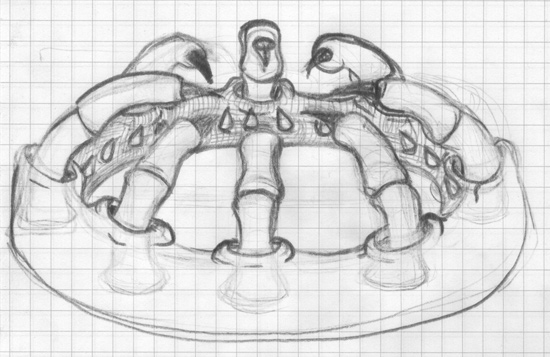
After the contest’s theme was announced I started to think hard about what could I create to come out the best and win the contest. Almost immediately I realized that the generic cutting-out of patterns in some sheet material isn’t going to cut it — the result is either simple and even or sophisticated and crooked or sophisticated and even, but made with a CNC — all of this isn’t really impressive in my opinion. Instead of regular “flat” grills, I wanted to make something that had volume. For some reason an old guide for making a 3D acrylic grill didn’t leave my mind. As time passed, the first simple idea to make something like an outstretched arm evolved into a sketch, which can be seen above. I should thank my girlfriend not only for this sketch (drawing isn’t really one my strongest points), but also for helping me with ideas.
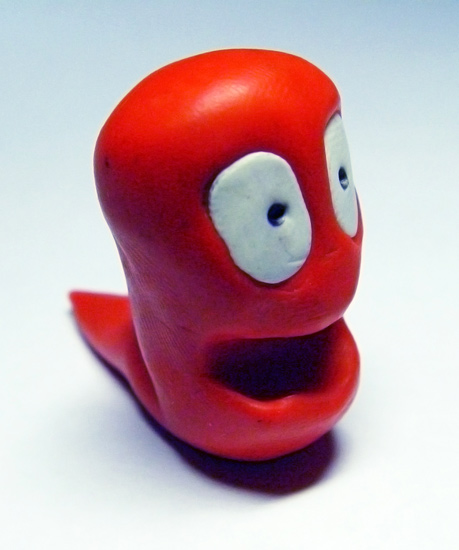
Choosing the right materials was my first step to accomplish the set task. Luckily, I had recently learned about polymer clay, having bought a set to make a small project, which wasn’t related to PC modding. The material it self is similar to plasticine, but is harder and less sticky, it also hardens when heated to 130° C, becoming quite solid, although exact characteristics depend on the brand. For my first experience with polymer clay I went with a Cernit branded “red” color polymer clay, which was the first problem. Upon opening the packaging, I found out that the material’s color was more pink than red, which was a slight bummer. Despite this, I decided to make something just to get some hands-on with the material. Considering the color of the material, I thought that the best idea was to make a little worm from the “Worms” game-series, but the worm turned out “scalded” — the material did turn red after polymerization (I didn’t encounter this effect with any other brands or colors of polymer clay).
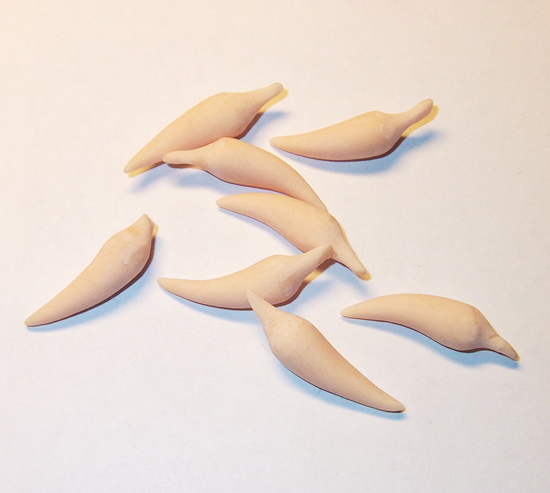
My first experience working with polymer clay was considered successful, so I went and bought some more polymer clay of flesh and terra cotta colors and started to sculpt. The first thing I modeled and baked were these simple claws.
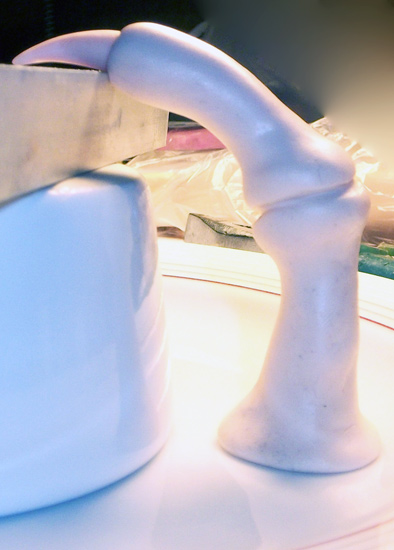
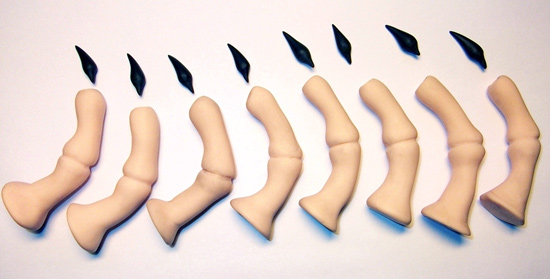
Then I decided to sculpt the main “fingers”, in which the claws would be inserted later, forming the necessary recess (I planned to permanently fasten them together later using epoxy glue). At first, it seemed hard, but later I got the hang of it and everything went much smoother. I had to use some improvised supports to avoid them bending under their own weight.
Afterwards, each finger was sanded by hand to remove all flaws, that arose because of modeling (sharp angles, fingerprints and other random indentations). The overall picture began to emerge.
As I feared, the claws blended too much with the fingers. I wanted to get more contrast, so tried to paint some claws black — it turned out much better. After trying on the new claws and getting approval of some “influential people”, I decided to make all the claws black. I wanted to avoid unnecessary hassle with painting the claws, so I thought that making a new set from black polymer clay will be a better idea. Once again I went to the art-shop and bought some black polymer clay. The new black claws made the fingers seem like they belong to the hands of a grease monkey. All the new claws were sanded to achieve the ideal shape and also give them a matte finish. So, our set ready for assembly.
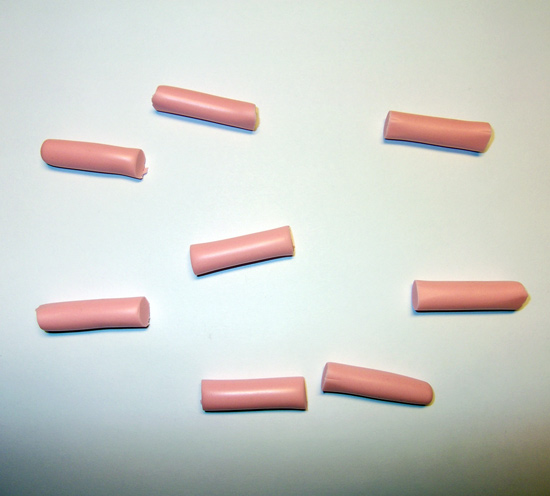
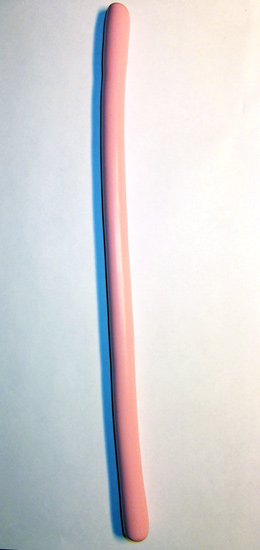
By design, these so-called fingers could be drawn into the main “body”, similar to cat claws, so I decided to do something like gingiva in a place where they protrude from the body. To make this I needed pink color, so I went and bought some polymer clay of a “Fuchsia” (a purple flower) color, but it turned out that it wasn’t really matching the color of gingiva. It wasn’t a huge problem, since I later learned that it’s very easy to get pink color — you just need to mix together flesh colored with a small amount of red colored polymer clay. The colors are mixed easy enough — just push them together in a single piece, roll the polymer clay between your hands to make a “sausage” and then bend it in half and repeat the process until the color becomes uniform. Having achieved the required color, I divided the “sausage” into eight separate pieces — one for each finger.
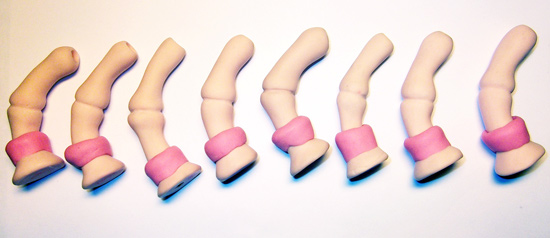
I rolled these eight pieces up into rings, which were later put on the fingers. Having the rings on the fingers, I proceeded to shape them and smooth them out, which was rather difficult, since the new polymer clay didn’t really stick to baked one and had a tendency to fall off. In general, it would be a better idea to model all the required pieces at once and bake them together later, but I haven’t yet reached a sufficient skill to immediately sculpt pieces that wouldn’t require further processing. Having said that, I did eventually install the gingiva onto the required place.
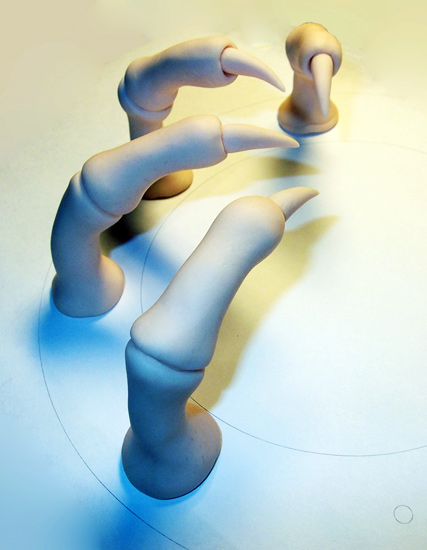
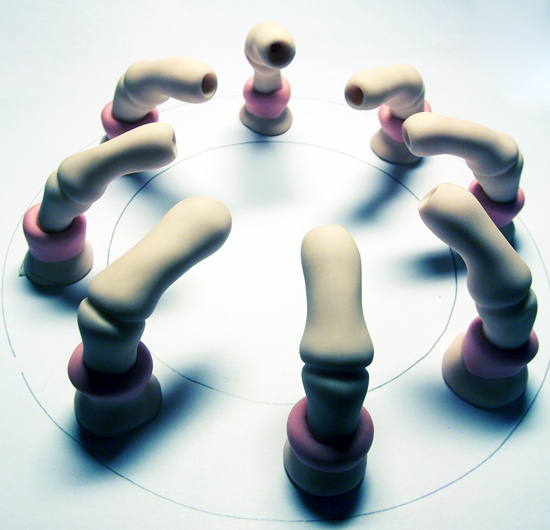
Having printed out a layout of the future foundation, I had preliminary placed all of the eight fingers on it — it’s already beautiful, isn’t it?
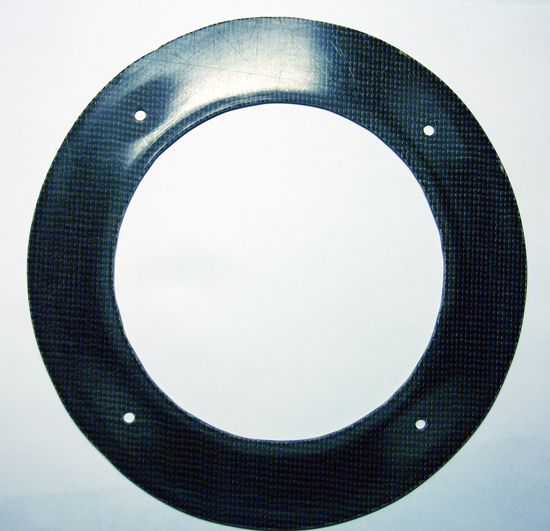
The time has come to make the foundation for the grill. Choosing the right material was essential, since such common PC modding materials as acrylic and various plastics weren’t up to the task, since they wouldn’t withstand the baking procedure, while maintaining their shape. Considering this, I decided to use textolite — a material that is used to make printed circuit boards, which I went and bought for this project. Having a sheet of textolite, I cut out a ring from it with an inner diameter of 120 millimeters and outer diameter of 180 millimeters. I also made sure to make some mounting holes.
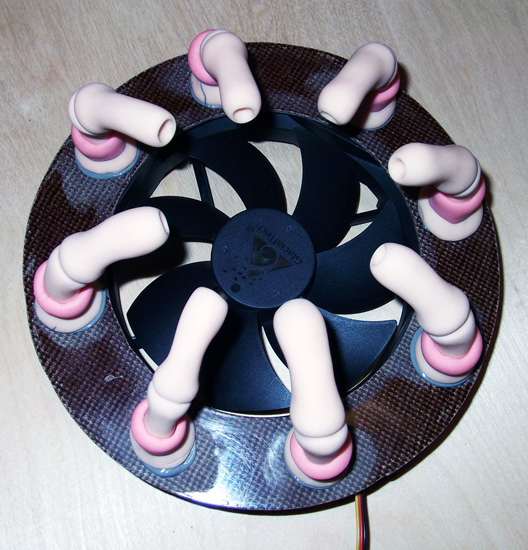
I used 30 millimeter long round head M4 screws as fan mounts, which I slipped through the mounting holes that I made earlier in the textolite foundation. The length of these screws was enough to install a fan on them and secure it in place by tightening the nuts behind it. I used Poxipol (a two-part epoxy adhesive) to glue all of the fingers to the textolite foundation, following the layout that I made earlier. It’s worth noting that I had to take the screw heads into consideration by making small recesses at the bottom of the four fingers.
The next thing I decided to model was the main “body”. To model it, I used the terra cota colored polymer clay, which I mentioned before. This polymer clay was different from the rest, since it polymerized in the open air, without baking. This particular “feature” became a major problem because the polymer clay gradually solidified in the process of sculpting, reducing the ability of different pieces of polymer clay to stick one to another. It also prevented me to apply a texture on the polymer clay. In the end, the “body” was lacking in volume for two reasons: 1) I didn’t have enough material; 2) the material shrinked when it completely solidified. The shrinkage of the material also resulted in numerous cracks, that appeared on the surface of the polymer clay. Among other things, the color was much more pale than I imagined, while the material wasn’t durable enough.
Considering all of the above, it shouldn’t be a surprise that I didn’t feel that like it was good enough for a finished project. I decided to use the existing “body” simply as “filling”, on which I would apply a new layer of polymer clay. The new layer would act as a “skin” and would be made from a more appropriate material. The decision was made late saturday evening, which was a penultimate day of the contest.
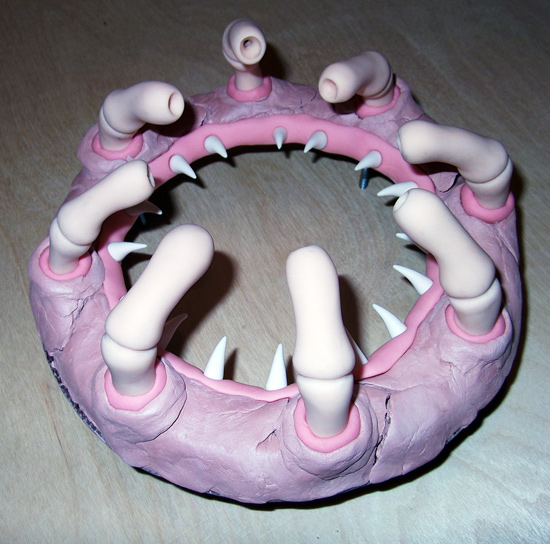
I couldn’t work on the grill for the first half of sunday, since I promised to go out with my girlfriend, but there was a an art shop nearby, so I went and bought a set of cherry colored polymer clay from Sonet. Upon arriving back home, I continued the work on my grill project. First, I decided to make something like an inner gingiva with small teeth on the grill’s inner perimeter. I deliberately left a special groove for it, when modeling the “body”. And again, I mixed some polymer clay of red and flesh colors to achieve the required pink polymer clay in a form of a long “saugage”.
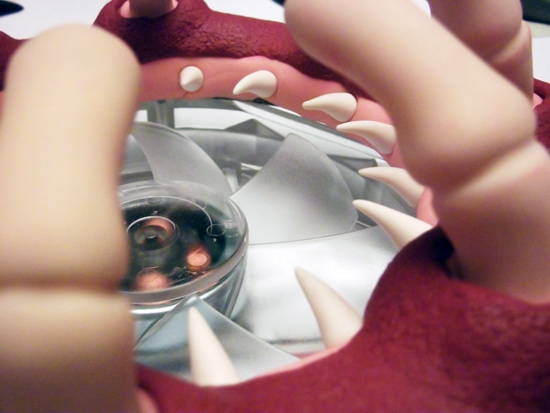
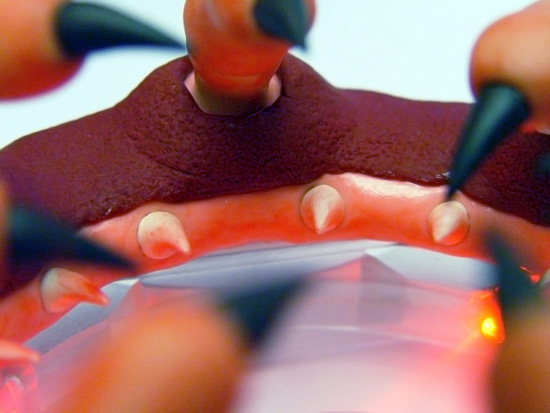
Placing the inner gingiva was a rather difficult task, since it didn’t really want to stick to the existing “body” and tended to fall out of the groove. The problem was that I couldn’t hold it throughout its entire area with only two hands, so I requested the assistance of some spare hands and eventually managed to insert it into place. After the inner gingiva was placed, I stuck a set of small teeth into it, which I made earlier. These teeth are very similar to the “claws” that I modeled earlier, with the main difference being the color. After installing the teeth into the inner gingiva I sent the grill into the oven for baking.
Three hours prior to midnight, I was on a home stretch and started to sculpt the “skin” layer. This was perhaps the most difficult part of the project, mostly because the new brand of polymer clay turned out to be very stiff, so by the end my fingers literally whined. I kneaded the pieces of polymer clay into “pancakes”, sticking them all over the main “body” of the grill. As usual, new pieces of polymer clay weren’t very cooperative in sticking to the baked ones. On the other hand, sealing the gaps between the pieces was a rather easy process with this brand of polymer clay.
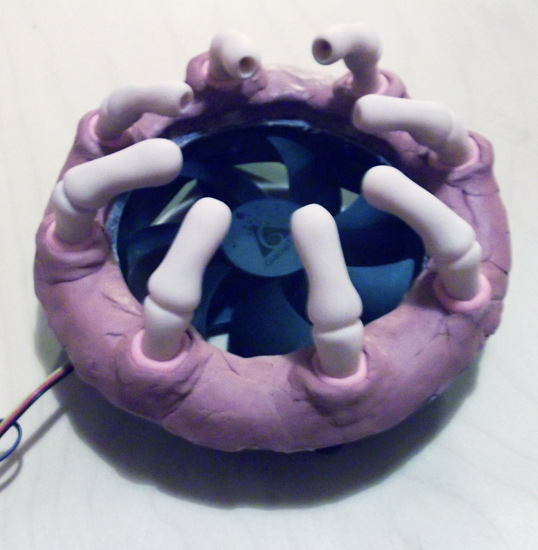
The final texture was applied to the “skin” with a regular shower sponge, using the firmer side of it. It wasn’t an easy task, since I was repeatedly dabbing the surface with the force. This took me two and a half hours, so it was half past eleven — time was running out. It took another 15 minutes to prepare for the photo shoot, but I’ve managed to post the photos on time. As you can imagine, at the time of photo shoot I didn’t even manage to bake the final layer of polymer clay — the grill went into the oven immediately after the photo shoot, which didn’t effect the final look of the project.
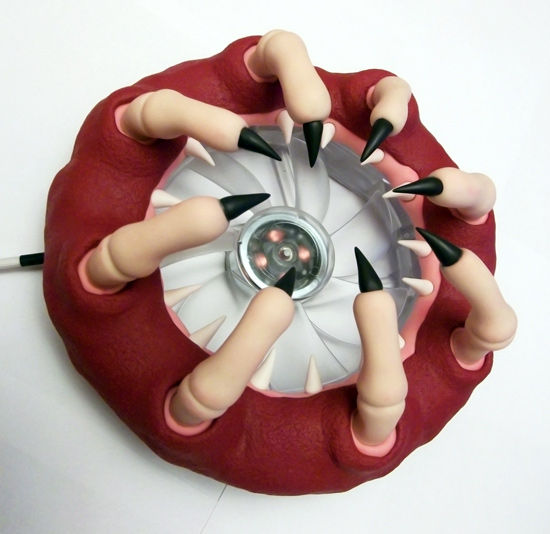
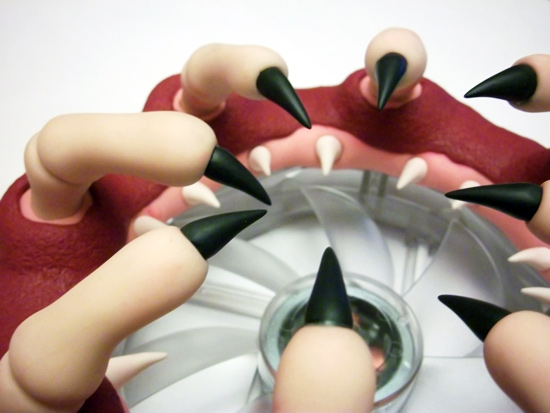
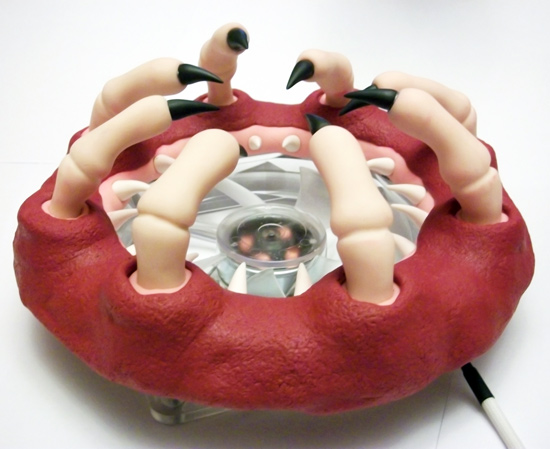
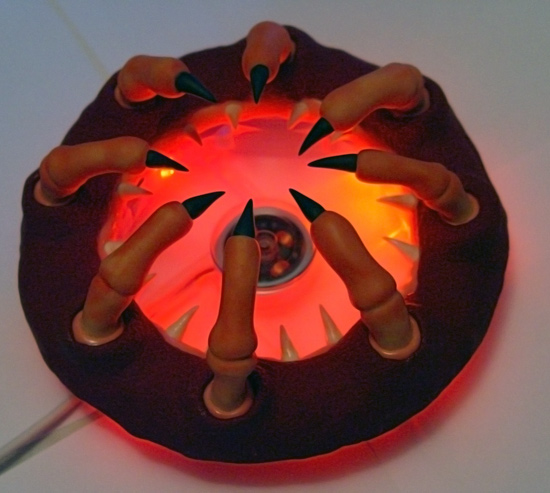
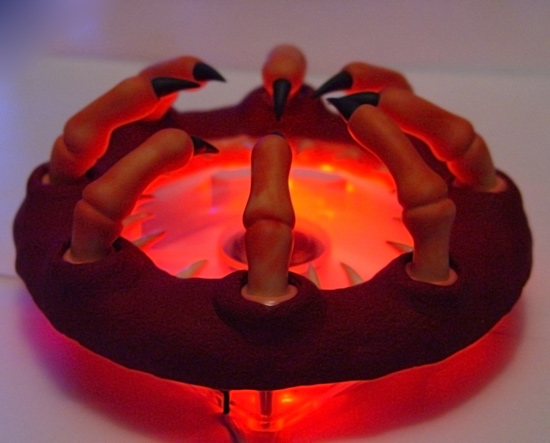
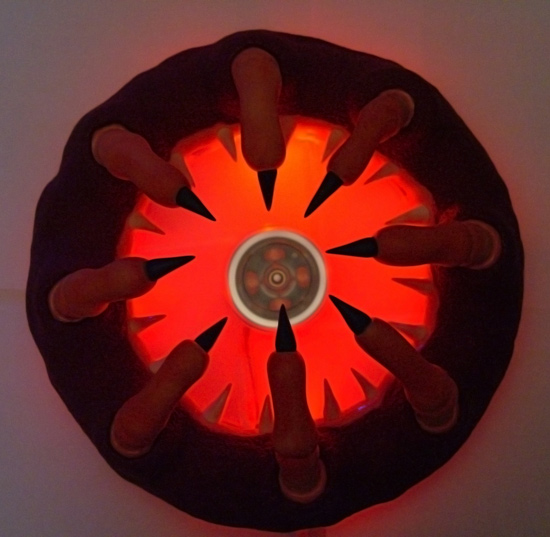
Here is a set of photos of the finalized grill, with which I participated in the modding contest.
Despite winning the contest, I still decided to complete the grill, since I didn’t have time to implement some of the ideas, such as:
1) Illumination. The original grill lacked backlight, since the hastily purchased fan for it didn’t have any sign of LEDs in it (I was confused by the big “Green” sticker, which turned out to be nothing more than some marketing bullshit about its supposed environmental friendliness), which baffled my — what is the point of translucent blades on a fan, if it lacks illumination? So, I upgraded this fan by installing four 5 mm red LEDs — I didn’t make any pictures of the process, since it’s rather simple and non-interesting.
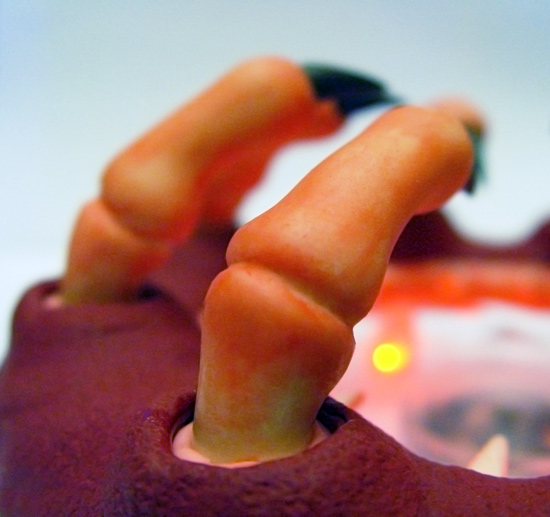
2) Realism. The finished grill seemed too clean and sterile for a bloodthirsty monster, so I slightly smeared the “fingers”, “teeth” and inner gingiva with red paint. I believe that the result is more developed, atmospheric and realistic.
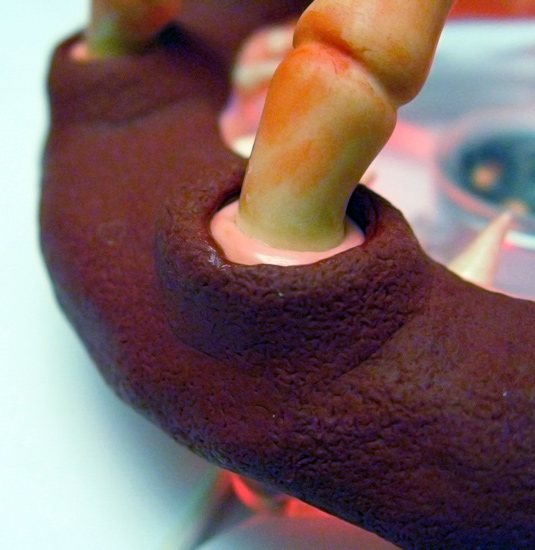
3) Improving the gingiva. To make the gingiva look more like a real gingiva it needed to be “wet”, or at least look wet. To achieve this effect, I covered the gingiva with glossy varnish, which certainly gave some effect.
Well, that’s what I got in the end. These refinements are probably hard to notice at a glance, but I’m more pleased with a finalized mod.
In the end, I would like to express my gratitude to BlackJack and my girlfriend, who supported me in every way, even when I was giving up, and always believed in my unconditional victory ;-). I also would like to wish all of you more successful mods.
